Starting from Windows 10 1809, Microsoft has changed the way to install the Remote Server Administration Tools (RSAT) package in desktop OSs. Previously, after each Windows 10 build upgrade (for example, from 1809 to 1903), you had to manually download the MSU package with the latest version of the RSAT package and install it on your computer. However, today the following message is displayed on the RSAT download page on the Microsoft website:
IMPORTANT: Starting with Windows 10 October 2018 Update, RSAT is included as a set of “Features on Demand” in Windows 10 itself.
RSAT on Windows 10 as Features on Demand (FoD)
The fact is that starting from Windows 10 1809 (17763), you no longer have to manually download the latest version of RSAT from Microsoft. Now the Remote Server Administration Tools package is built-in into the Windows 10 image and is installed as a separate option (Features on Demand). You can now install RSAT from the Settings app. The Windows 10 distro doesn’t contain RSAT installation files. To install RSAT package, your computer needs direct Internet access. In addition, you cannot install RSAT in the Windows 10 Home edition, only Professional and Enterprise versions are suitable.
To install RSAT in Windows 10 1809, go to Settings -> Apps -> Manage Optional Features -> Add a feature. Here you can select and install specific tools from the RSAT package.

The following server administration tools are available:
- RSAT: Active Directory Domain Services and Lightweight Directory Services Tools
- RSAT: BitLocker Drive Encryption Administration Utilities
- RSAT: Active Directory Certificate Services Tools
- RSAT: DHCP Server Tools
- RSAT: DNS Server Tools
- RSAT: Failover Clustering Tools
- RSAT: File Services Tools
- RSAT: Group Policy Management Tools
- RSAT: IP Address Management (IPAM) Client
- RSAT: Data Center Bridging LLDP Tools
- RSAT: Network Controller Management Tools
- RSAT: Network Load Balancing Tools
- RSAT: Remote Access Management Tools
- RSAT: Remote Desktop Services Tools
- RSAT: Server Manager
- RSAT: Shielded VM Tools
- RSAT: Storage Migration Service Management Tools
- RSAT: Storage Replica Module for Windows PowerShell
- RSAT: System Insights Module for Windows PowerShell
- RSAT: Volume Activation Tools
- RSAT: Windows Server Update Services Tools.
Install RSAT on Windows 10 with PowerShell
You can install RSAT admin components using PowerShell. In this example, we will show you how to manage RSAT components in the latest Windows 10 1903 from the PoSh cli.
Using the following command, you can check whether RSAT components are installed on your computer:
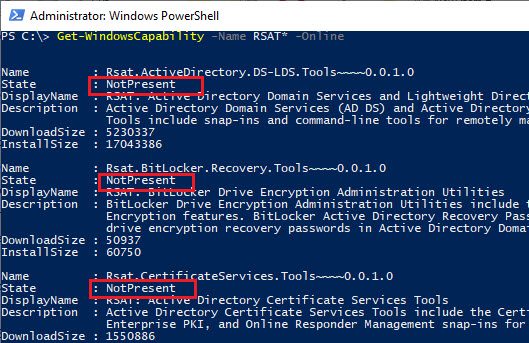
Get-WindowsCapability -Name RSAT* -Online
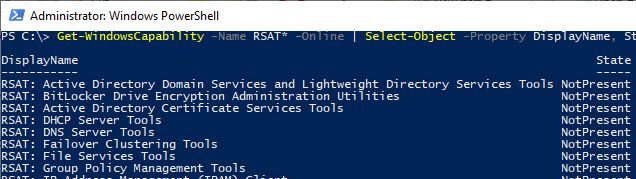
You can view the status of installed RSAT components in a more convenient table:
Get-WindowsCapability -Name RSAT* -Online | Select-Object -Property DisplayName, State
As you can see, the RSAT components are not installed (NotPresent state).
You can use the Add-WindowsCapacity cmdlet to install these Windows features.
To install a specific RSAT tool, such as AD management tools (including the ADUC console and the Active Directory module for Windows PowerShell), run the command:
Add-WindowsCapability –online –Name “Rsat.ActiveDirectory.DS-LDS.Tools~~~~0.0.1.0”
To install the DNS management console and the PowerShell DNSServer module, run:
Add-WindowsCapability –online –Name “Rsat.Dns.Tools~~~~0.0.1.0”
Etc.Add-WindowsCapability -Online -Name Rsat.FileServices.Tools~~~~0.0.1.0
Add-WindowsCapability -Online -Name Rsat.GroupPolicy.Management.Tools~~~~0.0.1.0
Add-WindowsCapability -Online -Name Rsat.IPAM.Client.Tools~~~~0.0.1.0
Add-WindowsCapability -Online -Name Rsat.LLDP.Tools~~~~0.0.1.0
Add-WindowsCapability -Online -Name Rsat.NetworkController.Tools~~~~0.0.1.0
Add-WindowsCapability -Online -Name Rsat.NetworkLoadBalancing.Tools~~~~0.0.1.0
Add-WindowsCapability -Online -Name Rsat.BitLocker.Recovery.Tools~~~~0.0.1.0
Add-WindowsCapability -Online -Name Rsat.CertificateServices.Tools~~~~0.0.1.0
Add-WindowsCapability -Online -Name Rsat.DHCP.Tools~~~~0.0.1.0
Add-WindowsCapability -Online -Name Rsat.FailoverCluster.Management.Tools~~~~0.0.1.0
Add-WindowsCapability -Online -Name Rsat.RemoteAccess.Management.Tools~~~~0.0.1.0
Add-WindowsCapability -Online -Name Rsat.RemoteDesktop.Services.Tools~~~~0.0.1.0
Add-WindowsCapability -Online -Name Rsat.ServerManager.Tools~~~~0.0.1.0
Add-WindowsCapability -Online -Name Rsat.Shielded.VM.Tools~~~~0.0.1.0
Add-WindowsCapability -Online -Name Rsat.StorageMigrationService.Management.Tools~~~~0.0.1.0
Add-WindowsCapability -Online -Name Rsat.StorageReplica.Tools~~~~0.0.1.0
Add-WindowsCapability -Online -Name Rsat.SystemInsights.Management.Tools~~~~0.0.1.0
Add-WindowsCapability -Online -Name Rsat.VolumeActivation.Tools~~~~0.0.1.0
Add-WindowsCapability -Online -Name Rsat.WSUS.Tools~~~~0.0.1.0
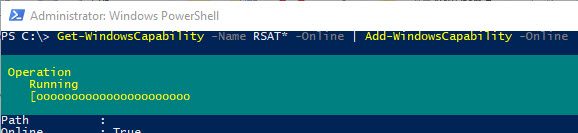
To install all the available RSAT tools at once, run:
Get-WindowsCapability -Name RSAT* -Online | Add-WindowsCapability –Online
To install only disabled RSAT components, run:
Get-WindowsCapability -Online |? {$_.Name -like "*RSAT*" -and $_.State -eq "NotPresent"} | Add-WindowsCapability -Online
Now make sure that all RSAT tools are installed (Installed state).

After that, the installed RSAT tools will appear in the Manage Optional Features panel.
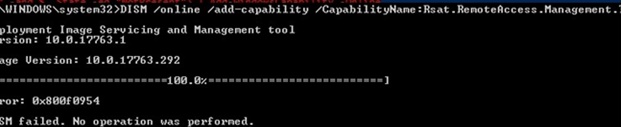
RSAT Install Error 0x800f0954 in Windows 10
If you have Internet access on Windows 10 desktops, but when installing RSAT via Add-WindowsCapability or DISM (DISM.exe /Online /add-capability /CapabilityName:Rsat.ActiveDirectory.DS-LDS.Tools~~~~0.0 .1.0), you encounter the error 0x800f0954, most likely your computer is configured to update from the local WSUS update server using Group Policy settings.
To correctly install RSAT components in Windows 10 1809+, you can temporarily disable updating from the WSUS server through the registry (open the registry key HKLMSOFTWAREPoliciesMicrosoftWindowsWindowsUpdateAU and change the UseWUServer to 0) and restart the Windows Update Service (wuauserv).
You can use the following PowerShell script:
$currentWU = Get-ItemProperty -Path "HKLM:SOFTWAREPoliciesMicrosoftWindowsWindowsUpdateAU" -Name "UseWUServer" | select -ExpandProperty UseWUServer
Set-ItemProperty -Path "HKLM:SOFTWAREPoliciesMicrosoftWindowsWindowsUpdateAU" -Name "UseWUServer" -Value 0
Restart-Service wuauserv
Get-WindowsCapability -Name RSAT* -Online | Add-WindowsCapability –Online
Set-ItemProperty -Path "HKLM:SOFTWAREPoliciesMicrosoftWindowsWindowsUpdateAU" -Name "UseWUServer" -Value $currentWU
Restart-Service wuauserv
Or you can configure a new group policy option that allows you to configure installation options for additional Windows and Features On Demand components (including RSAT).
- Open the local GPO editor – gpedit.msc;
- Go to the GPO section Computer Configuration -> Administrative Templates -> System;
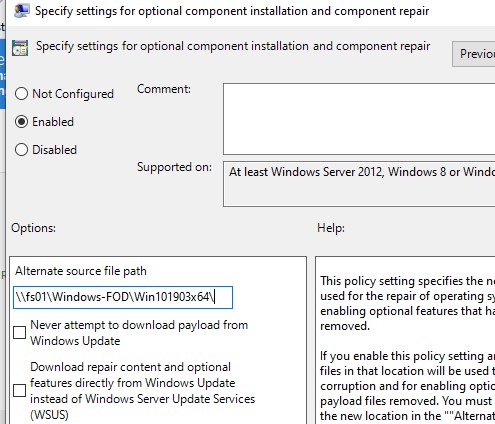
- Enable the policy Specify settings for optional component installation and component repair, and check the option Download repair content and optional features directly from Windows Updates instead of Windows Server Updates Services (WSUS);
- Save the changes and update policy settings (
gpupdate /force).
Installing RSAT via PowerShell or DISM should now should be completed without error.
Installing RSAT Offline in Windows 10 Using FoD ISO Image
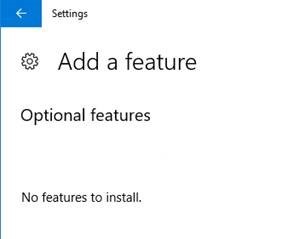
If you are facing the Add-WindowsCapability error when installing RSAT, or you don’t see RSAT in the list of additional components (No features to install), most likely your computer is configured to receive updates from the internal WSUS/SCCM SUP server. Let’s consider how to install RSAT in Windows 10 1903 offline (in a corporate domain network without direct access to the Internet).
For offline RSAT installation, you need to download the FoD ISO image for your Windows 10 build from your personal section on the Microsoft MSDN / Volume Licensing Service Center (VLSC). The image is called something like this: Windows 10 Features on Demand, version 1903.
For example, for Windows 10 1903 x64 you need to download the image file SW_DVD9_NTRL_Win_10_1903_64Bit_MultiLang_FOD.ISO (about 5 GB). Extract the iso image file to the shared network folder. You will get a set of *.cab files.
Now, to install the RSAT components on the Windows 10 desktop, you need to specify the path to this FoD network directory. For example:
Add-WindowsCapability -Online -Name Rsat.ActiveDirectory.DS-LDS.Tools~~~~0.0.1.0 -LimitAccess -Source \contoso-fs-01Windows-FODWin101903x64

You can also specify the path to the directory with the FoD components using the group policy parameter discussed above. To do this, in the Alternative source file path you need to specify the UNC directory path to your FoD distro.
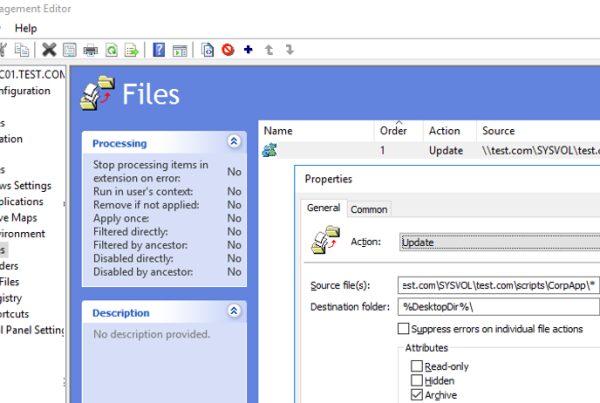
Or you can set this parameter through the registry with a separate policy by specifying the directory path in the LocalSourcePath parameter (REG_Expand_SZ) in the registry key HKLMSOFTWAREMicrosoftWindowsCurrentVersionPoliciesServicing.
After that, users will be able to independently install RSAT components in Windows 10 through the graphical interface of Manage Optional Features.
