On a server running Windows Server 2016, an additional disk (not a system one) connected as a SAN LUN over FC may go offline after each restart of the server. If you open Disk Management console (diskmgmt.msc), you can see that this disk is in Offline state.
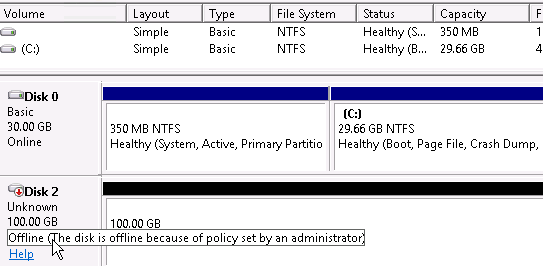
To make the disk available in Windows, right-click it and take it online. You will have to do it after each server restart. I don’t think you’ll be happy with that.
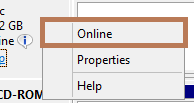
First of all, I suspected that after a power outage in the server room, the storage systems booted later than the physical server. However, after a soft server reboot the disk went offline as well.
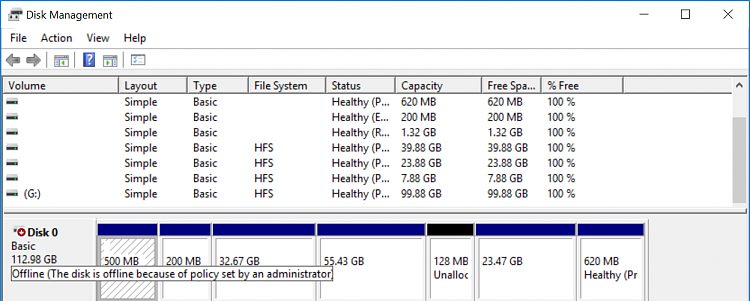
Note the popup message about a disconnected disk in the Disk Management:Offline (The disk is offline because of policy set by an administrator).
As it turned out, this problem may appear in the failover cluster environments or virtual machines running Windows that have any shared disks can be accessed by several operating systems. It is related to the SAN Policy that appeared in Windows Server 2008. This policy controls automatic mounting of external disks and is used to protect shared disks available to multiple servers at once. By default, the Offline Shared (VDS_SP_OFFLINE_SHARED) policy is used for all SAN disks on Windows Server. You can change your SAN Policy to OnlineAll using Diskpart.
Run the command prompt as administrator and run the diskpart. In diskpart context, display the current SAN policy:
DISKPART> san
SAN Policy : Offline Shared
Change your SAN Policy:
DISKPART> san policy=OnlineAll
DiskPart successfully changed the SAN policy for the current operating system.

View the current policy again:
DISKPART> san
SAN Policy : Online All
Select your disk (in our example, the disk index is 2):
DISKPART> select disk 2
You can view its attributes:
DISKPART> attributes disk
Make sure that the Read-Only attribute is not enabled. If it is, disable it, otherwise when trying to write something on the disk, you will see this message: The disk is write protected:
DISKPART> attributes disk clear readonly
Take the disk online:
DISKPART> online disk
DiskPart successfully onlined the selected disk
You can manage your disks not only in Diskpart, but also using the integrated PowerShell Storage module. For example, to take a disk online, run this command:
Set-Disk 2 -IsOffline 0
Close diskpart, restart your server and make sure that the disk is available after boot.
It turned out that the problem of unavailability of connected disks is typical not only for Windows Server, but also for all desktop Windows versions. For example, if you connect an external USB drive or an SSD in Windows 10, you can also see the following disk status (Offline – The disk is offline because of policy set by an administrator) in the Device Manager:
In Windows 10, the issue with the offline disks is solved in the same way: you need to change the SAN policy. If the disk is new, you may need to initialize it and create file system partitions on it.

