You can use the SFC (System File Checker) and DISM (Deployment Image Servicing and Management) commands to check and repair the integrity of system files and components of your Windows 10 image. These tools may be very useful if your Windows is unstable, errors appear when you trying to run apps or services, after a virus infection, etc. In this post, we will look on how to use the DISM and SFC tools to check and repair you Windows 10 image and system files.DISM.exe is a built-in Windows tool and may be used in all supported Windows versions starting from Windows 7/Windows Server 2008 R2 (there are some restrictions) to the latest Windows 10 and Windows Server 2019 builds.
SFC /ScanNow: Using System File Checker to Scan and Repair System Files
It is recommended to use DISM to restore Windows after you have checked the integrity of your system files using the SFC tool. The sfc /scannow command scans protected system files and if they are missing or corrupted it tries to restore their original copies from Windows system component store (C:\Windows\WinSxS folder).
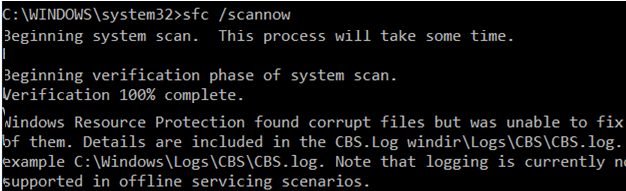
If sfc /scannow command returns the error “Windows Resource Protection found corrupt files but was unable to fix some of them“, it is likely that the tool could not get the necessary files from Windows component store (see the image below).
In this case you can try to repair the component store (your Windows image) using the DISM.exe command.
After the image repair, you can try using SFC to restore your system files.
DISM /RestoreHealth: How to Repair Windows Image?
To scan a Windows image for errors and fix them, the DISM /Cleanup-image parameter is used. The commands considered below are executed in the elevated command prompt (with the administrator privileges).
Run the following command to check if there are any flags of corruption of the Windows image component store (not applicable for Windows 7/Server 2008R2). This command checks the CBS flag set by one of the system processes.
DISM /Online /Cleanup-Image /CheckHealth
When running this command, the component store scan is not performed. The command checks only the events previously written to the Windows logs. No changes are made. The command will check if the image is marked as corrupted and if it can be fixed.
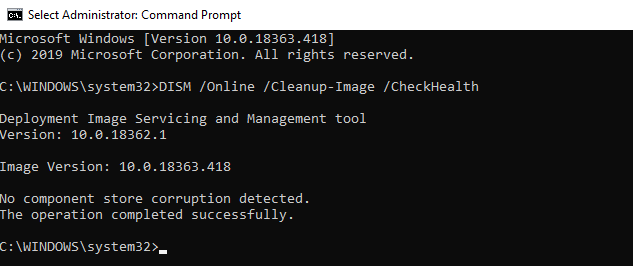
In this example, the command has returned that the Windows 10 image has no corruptions:
No component store corruption detected.
The operation completed successfully.
DISM /Online /Cleanup-Image /ScanHealth – perform a full scan of the Windows component store for corruptions (it takes quite a long time: 10-30 minutes).In order DISM /ScanHealth parameter to work on Windows 7 and Windows Server 2008 R2, you have to install the KB2966583 update. Otherwise you will see the message: “Error 87. The ScanHealth option is not recognized in this context”. Also, in Windows 7 the same command is used to check the component store and repair system files (there are no /CheckHealth or /RestoreHealth parameter).
In some cases the DISM /ScanHealth returns the following errors:
- The component store is repairable;
- DISM Error 1726 – “The remote procedure call failed”;
- DISM Error 1910 – “The object exporter specified was not found”.
It definitely means that your Windows 10 image is corrupted and needs to be repaired.
To fix these errors, automatically download and replace the files of corrupted or missing components with original file versions from Windows Update (your computer must have the direct Internet access), run this command:
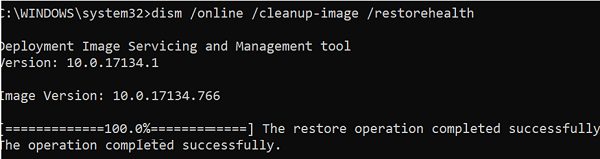
DISM /Online /Cleanup-Image /RestoreHealth
The process of scanning and repair of the components may take quite a long time (30 minutes or more).
If the repair has been successful, the following message will appear:
The restore operation completed successfully. The operation completed successfully.
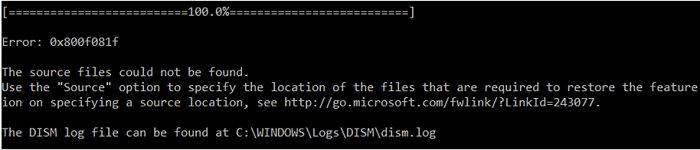
If your computer (server) has no direct Internet access (located behind a proxy, or have used internal WSUS to get security and build update) or Windows Update service is disabled, then the following errors appear when restoring the component store:
- 0x800f0906 – The source files could not be downloaded. Use the source option to specify the location of the files that are required to restore the feature;
- 0x800f0950 – DISM failed. No operation was performed;
- 0x800F081F – The source files could not be found. Use the “Source” option to specify the location of the files that are required to restore the feature.
You can specify a WIM or an ESD file with the original Windows installation image to be used as a source to restore the system component files. Suppose, you have mounted an installation Windows 10 ISO to the virtual drive E:. To repair the component store from the source image use one of these commands:
DISM /online /cleanup-image /restorehealth /source:E:\sources\install.wim
Or:DISM /online /cleanup-image /restorehealth /source:E:\sources\install.esd
To prevent the use of Windows Update online services and use only the local WIM/ESD file to scan and repair your Windows image:DISM /online /cleanup-image /restorehealth /source:E:\sources\install.wim /limitaccess
Or:DISM /online /cleanup-image /restorehealth /source:E:\sources\install.esd /limitaccess
dism /online /cleanup-image /restorehealth /limitaccess
Note: To repair the corrupted files in the component store from the local source, Windows build and edition in the WIM/ESD image must match those of your system.
You can find the DISM log of scanning and repair of the system files here: C:\Windows\Logs\CBS.log.
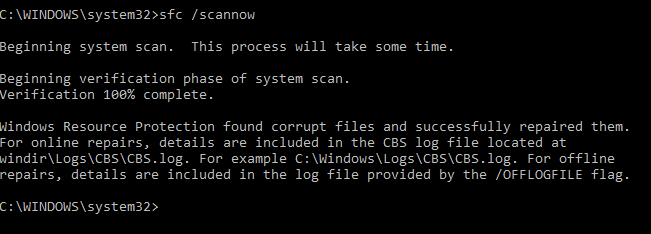
After the component store has been repaired, you can start the system file checker tool sfc /scannow. It is likely that it will be able to restore the corrupted files (Windows Resource Protection found corrupt files and successfully repaired them).
Repair Windows Component Store with PowerShell
The version of PowerShell for Windows 10 and Windows Server 2016/2019 has some cmdlets similar to the DISM commands discussed above. To scan the Windows component store and find any corruptions, run this command:
Repair-WindowsImage -Online –ScanHealth
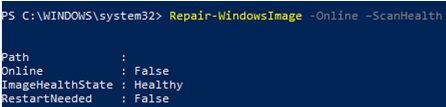
If there are no errors in the component store, the following message appears:
ImageHealth State: Healthy
To repair system components and files, run:
Repair-WindowsImage -Online -RestoreHealthIf you do not have direct Internet access, this command may freeze during the image recovery process. You can restore the system components from the local Windows image file (install.wim/install.esd ) copied from the Windows 10 installation ISO image:
Repair-WindowsImage -Online -RestoreHealth -Source F:\sources\install.wim:1
Where 1 is the index of your Windows edition from the WIM or ESD file (you can display the list of Windows editions in a WIM file as follows: Get-WindowsImage -ImagePath "F:\sources\install.wim").
Use DISM Offline Component Store Repair If Windows Won’t Boot
If Windows does not boot correctly, you can use DISM to check and repair system files of your Windows image offline.
- To do it, boot from the installation (LiveCD/USB) disk and press
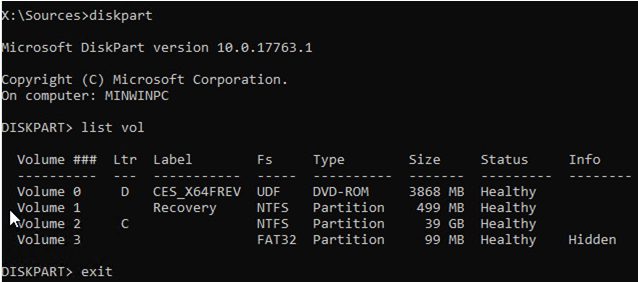
Shift + F10on the initial Windows install screen; - To check the drive letters assigned in WinPE, run the command
diskpart->list vol(in my example, the letter C:\ is assigned to the disk, on which Windows is installed, and I will use it in the next commands);
- Check the system files and repair the corrupted ones with the command:
sfc /scannow /offbootdir=C:\ /offwindir=C:\Windows - To repair the offline WIndows component store, use the following command (I am using a WIM file with the Windows 10 installation image from which the computer is booted as a source to restore my offline Windows image):
Dism /image:C:\ /Cleanup-Image /RestoreHealth /Source:D:\sources\install.wim - If there is not enough free space on the target disk, you will need a separate drive, e. g., F:\, on which you will create an empty folder
mkdir F:\scratch. Perform a repair of the component store using the scratch dir with the command:Dism /image:C:\ /Cleanup-Image /RestoreHealth /Source:D:\sources\install.wim /ScratchDir:F:\scratch