Network scanning is one of the services that is rarely managed centrally even in large infrastructures. In Windows Server 2008 R2 or higher there is a separate role of distributed network scanning (Distributed Scan Server — DSM) that enables to simplify document workflow and processing of scanned documents in the Active Directory domain. In this article we’ll look on how to configure the distributed network scanning service on Windows Server 2012 R2.
The Distributed Scan Server is a separate service of the Print and Document Service role that allows you to receive scanned documents from the network scanners and saving them to the specific network shared folders on the file servers and SharePoint sites or sending them to certain recipients via SMTP according to the configured policies.
The distributed network scanning allows to organize a single point to manage network scanners supporting WSD — Web Services on Devices (TCP/IP or local USB scanners are not supported as scanning devices). As a rule, network scanners with WSD support are large enterprise-level devices.
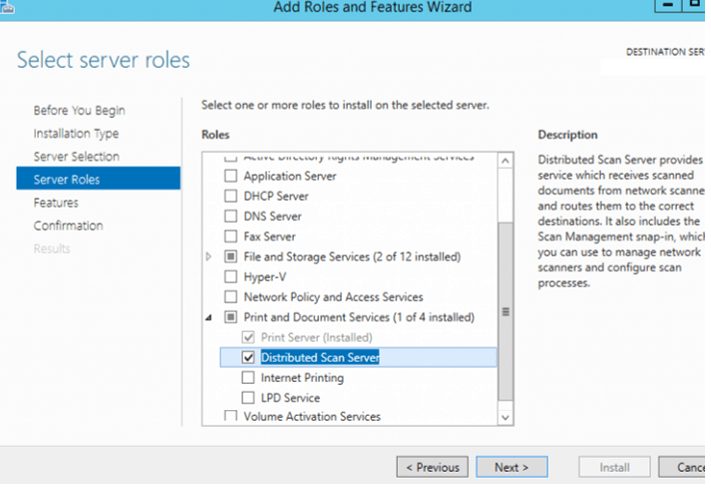
To install the network scanning service, select Print and Document Service role. Then select Print Server and Distributed Scan Server services in it.
You can also install this role using this PowerShell command:
Install-WindowsFeature -Name Print-Scan-Server -IncludeAllSubFeature

As you can see, you must restart the server.
After the role has been installed, a new scanning service appears in the system — Distributed Scan Server service (ScanServer): C:\Windows\System32\svchost.exe -k WSDScanServer.
To manage Distributed Scan Server, a separate mmc snap-in is used: Scan Management — ScanManagement.msc, which manages network scanners, settings and scanning tasks.
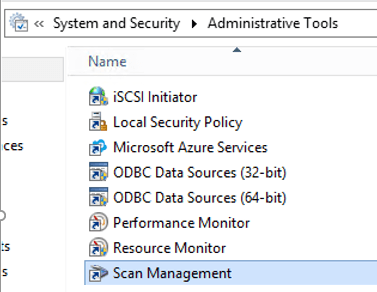
Run the Scan Management snap-in. As you can see, there are three sections:
- Managed Scanners;
- Scan Processes;
- Scan Servers.
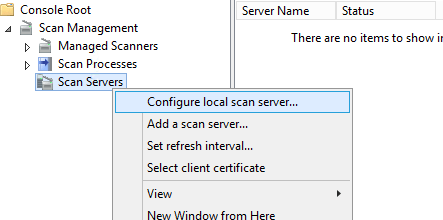
First of all, you must configure your scan server. To do it, right-click Scan Servers section and select Configure local scan server.
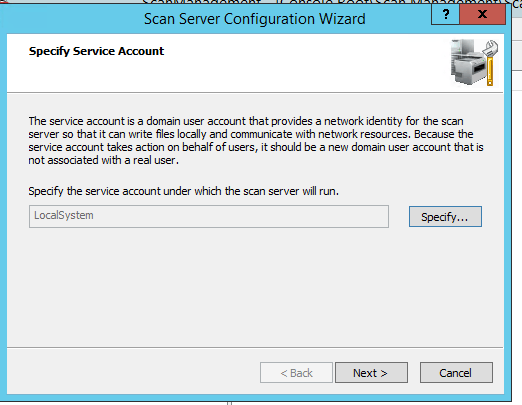
In the configuration wizard, specify the account under which the scan server will run (this account is used to access local and shared folders on other servers) By default, the LocalSystem account is used, however, it is recommended to create a separate service account for convenient access management in your AD domain and specify it here.
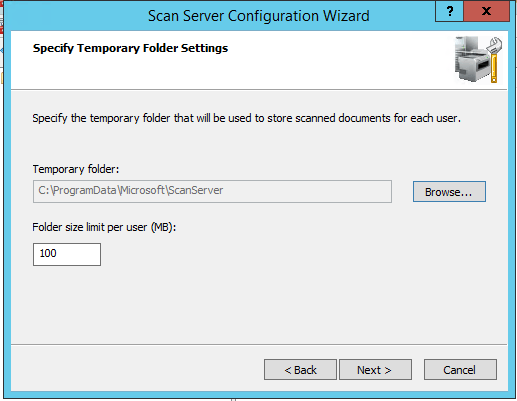
Then you must specify the location and maximum size of user temporary folders for scanned documents.
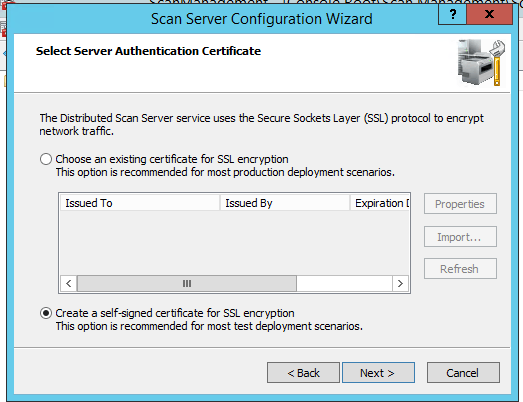
After that specify your email server address and an SSL certificate for network traffic encryption (a self-signed SSL certificate is suitable for test environment).
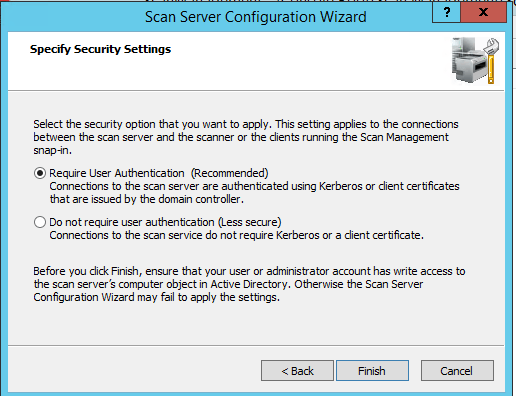
Then select the type of user authentication. You can enable user authentication (using Kerberos or client certificates) or disable it (anonymous access to the scan server).
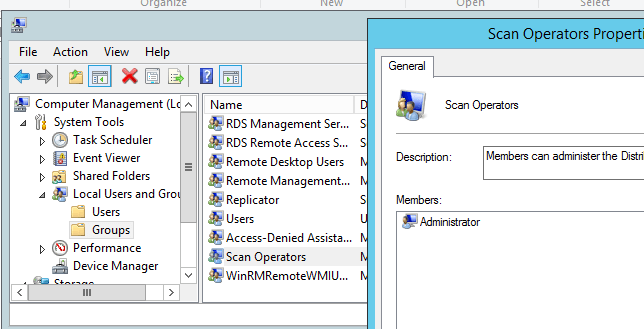
If you enable the authentication, make sure that you are a member of Scan Operators local group and you are allowed writing to a computer object of your server in the AD.
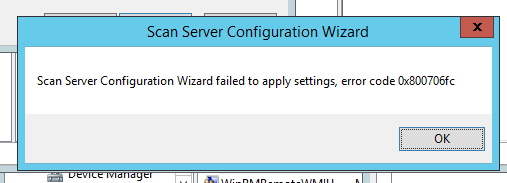
If during scan server configuration the following error appears:Scan Server Configuration Wizard failed to apply setting, error code 0x800706fc, make sure that you have specified the account under which the distributed scan service is running (with sufficient privileges), the path to the default scan folder and have granted the write privilege for the folder to this account.
Now you need to add your scan server to the console. To do it, right-click the Scan Servers, select Add a Scan server and enter the name of your server. If you are using a self-signed certificate, the name of the server must match its name in the certificate, but it must be typed UPPERCASE (strange…). You must also add the self-signed certificate to the trusted root certificates, or errors will appear when trying to add the server:Windows failed to contact the scan server you specified. This can be caused when the server name you specified does not match the name in the server certificate. If the server name from the certificate matches the server you want to connect to and you trust the network you are on, click Retry to restart the search with the certificate name.
andThe following devices could not be accessed because they are offline, there is a network issue, the names are incorrect, or the certificate needed to contact the device has not been selected: tor-scandsm1.
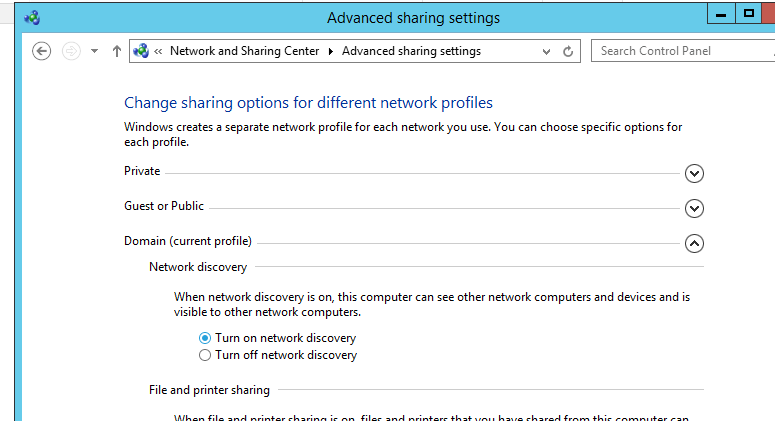
In order your scan server can find printers and scanners supporting Web Services on Devices (WSD) in your network, do the following:
- Turn on network discovery;
- Run the Device Association Service.
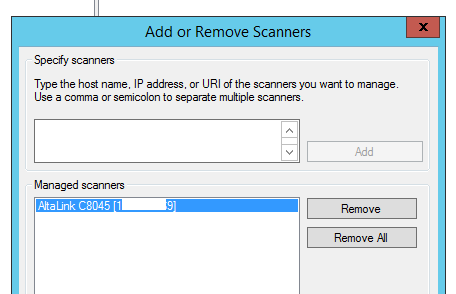
Now you can add the network scanners. Right-click Managed Scanners and select Manage. Specify the IP address or a DNS name of a network scanner. WSD support (Microsoft Services for Devices or Web Services Print) must be enabled in the scanner settings.
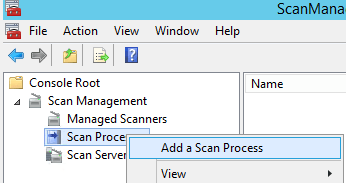
Now you can create a new scan process – PSP. Select Scan Processes -> Add a Scan Process.
Specify the name and description of the scan process, select scanning settings and specify the name of the Distributed Scan server.
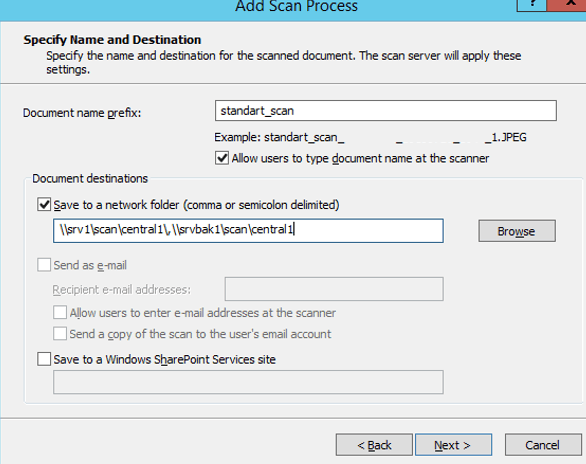
Then enter the document prefix and select where it will be saved. It can be one or more network shares (UNC paths are used), URLs on the SharePoint site or email addresses.
In the last step, you need to select users and the groups allowed to access this PSP and configure the access permissions.
Now we still have AD integration to be configured on the network scanners side (depends on the vendor). Users may use a password or a smartcard to authenticate on the scanners.
DSM operation scheme is shown below.
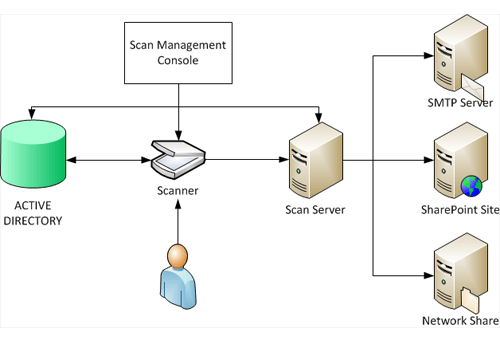
After a user has authenticated on the scanner, they can select a suitable PSP available for their accounts (according to their privileges). PSPs are stored in the Active Directory, and contain the rules with scan settings and document routing. The network scanner scans a document and sends it to the server for processing. The Distributed Scan Server processes the task and send the scanned document along the route specified in the PSP job.
Scan and task processing logs are located on the DSM server, and you can check the information on the completed tasks any time.

