By default, the logon screen in Windows 10/8.1 and Windows Server 2016/2012 R2 displays the account of the last user who logged in to the computer (if the user password is not set, this user will be automatically logged on, even if the autologon is not enabled). However, it is possible to display all user accounts on the welcome screen in Windows 10. You can configure different behavior of this function: you can show the last logon username, hide it, or even list all local or logged domain users.
How to Hide User Account from Windows Logon Screen?
Displaying the account name on the Windows login screen is convenient for users, but reduces the computer security. An attacker who gained local access to a computer will have to pick up only a password (for this there are various ways of social engineering, brute force attacks, or a banal sticker with a password on the monitor).
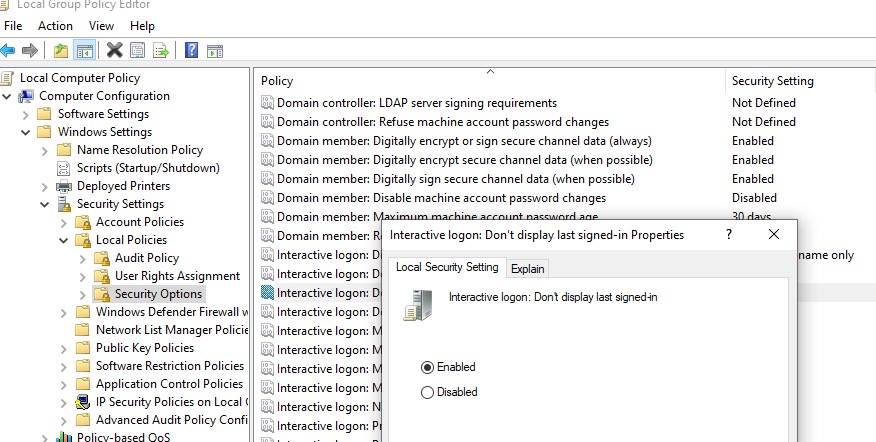
You can hide the last logged user name on a Windows welcome screen through the GPO. Open the domain (gpmc.msc) or local (gpedit.msc) Group Policy editor and go to the section Computer Configuration -> Windows Settings -> Security Settings -> Local Policies -> Security Options. Enable the policy “Interactive logon: Do not display last user name”. By default, this policy is disabled.
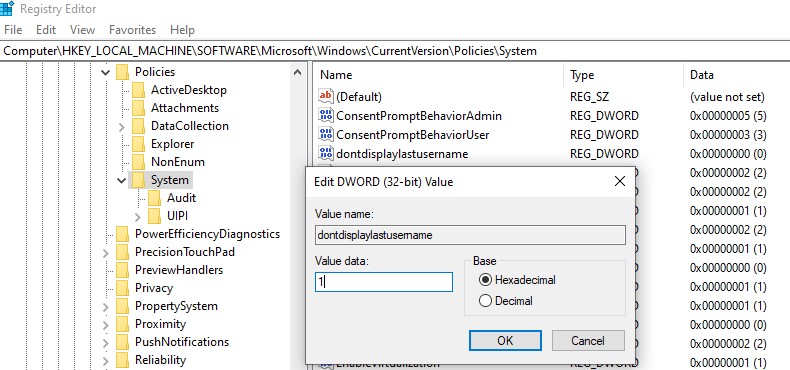
Also, you can hide the username on the login screen through the registry. To do this go to the registry key HKEY_LOCAL_MACHINE\SOFTWARE\Microsoft\Windows\CurrentVersion\Policies\System, create a new DWORD parameter named dontdisplaylastusername with the value 1.
Additionally, you can hide the username on a locked computer. To do this, in the same GPO section you need to enable the policy “Interactive logon: Display user information when the session is locked” and select the value “Do not display user information”.

A registry parameter named DontDisplayLockedUserId in the same registry key with a value of 3 corresponds to this policy setting.
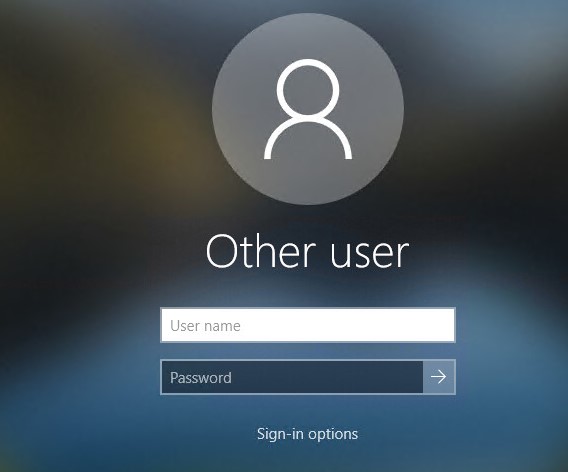
Now on the computer login screen and on the Windows lock screen, an empty fields for entering a username and password are displayed.
How to Show All Local User Account on Login Screen in Windows 10?
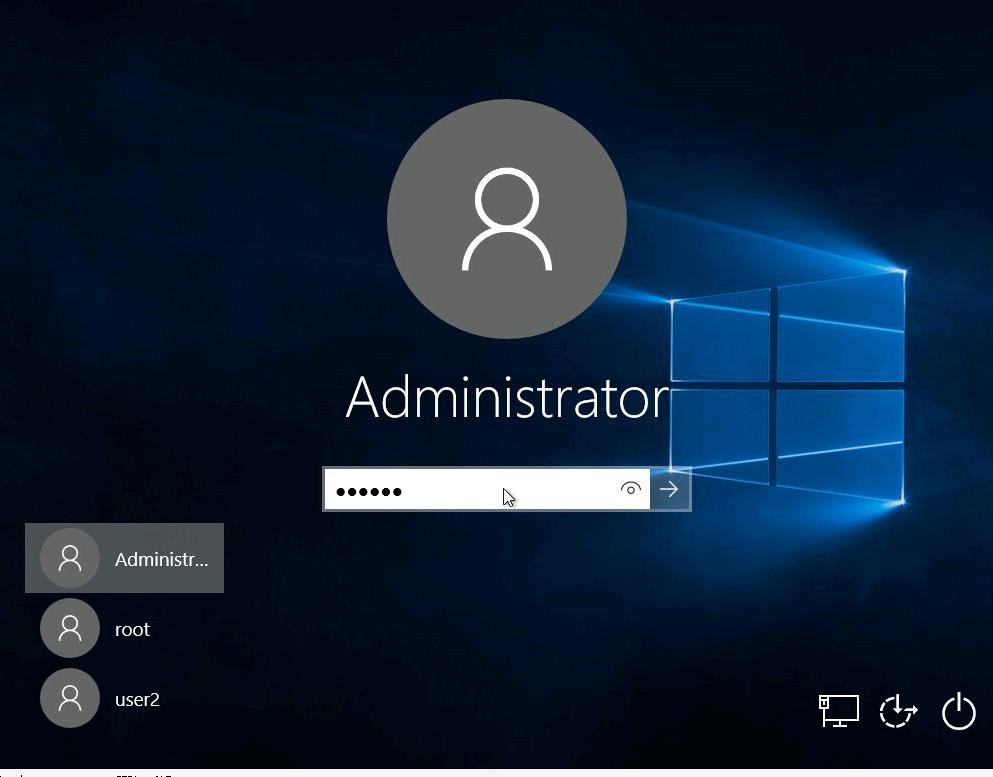
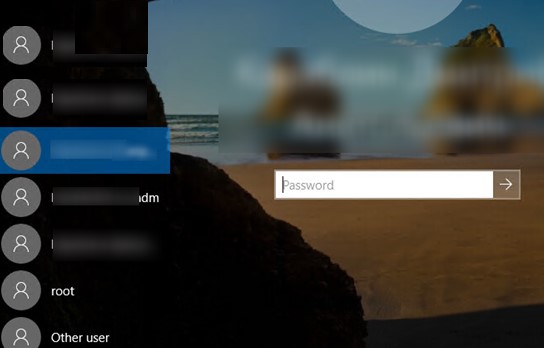
In Windows 10 / 8.1, you can list all local user accounts on the welcome screen. To log in to the computer, the user just needs to click on the desired account and specify its password.
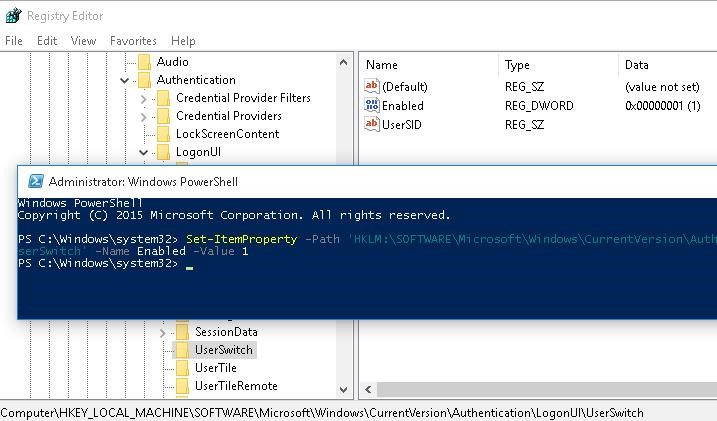
To display all local users on the Windows login screen, you need to change the value of Enabled parameter to 1 in the following registry key: HKEY_LOCAL_MACHINE\SOFTWARE\Microsoft\Windows\CurrentVersion\Authentication\LogonUI\UserSwitch. You can change this parameter through the RegEdit GUI, Reg Add cli command or Set-ItemProperty PowerShell cmdlet:
Reg Add HKLM\SOFTWARE\Microsoft\Windows\CurrentVersion\Authentication\LogonUI\UserSwitch /v Enabled /t REG_DWORD /d 1 /f
or
Set-ItemProperty -Path 'HKLM:\SOFTWARE\Microsoft\Windows\CurrentVersion\Authentication\LogonUI\UserSwitch' -Name Enabled -Value 1
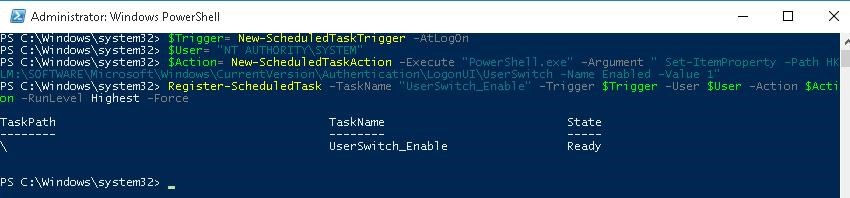
However, the Windows automatically resets the value of the Enabled parameter to 0 at each user logon. In order to always change the registry value to 1, it’s easier to create a new task in the Task Scheduler that will run at user logon.
The Scheduler task must run one of the commands shown above. You can create this task manually using the taskschd.msc graphic console. But it seems to me that it is much easier to create a Scheduler task using PowerShell. In our case, the commands to create a new task may look as follows:
$Trigger= New-ScheduledTaskTrigger -AtLogOn
$User= "NT AUTHORITY\SYSTEM"
$Action= New-ScheduledTaskAction -Execute "PowerShell.exe" -Argument "Set-ItemProperty -Path HKLM:\SOFTWARE\Microsoft\Windows\CurrentVersion\Authentication\LogonUI\UserSwitch -Name Enabled -Value 1"
Register-ScheduledTask -TaskName "UserSwitch_Enable" -Trigger $Trigger -User $User -Action $Action -RunLevel Highest –Force
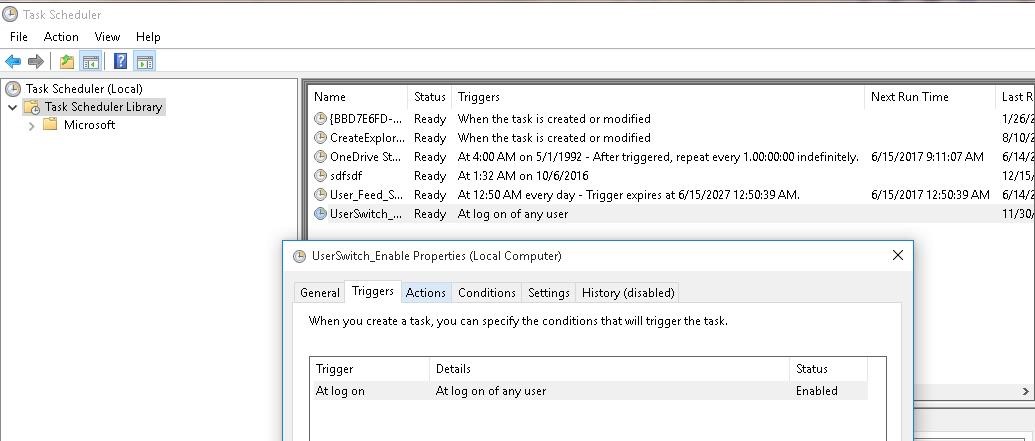
Make sure that the task appeared in Windows Task Scheduler (taskschd.msc).
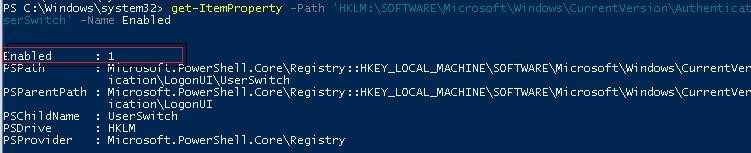
Log off and then log on again. The task must start automatically and change the value of Enabled registry parameter to 1. Check the current value of the parameter. As you can see, it is 1:
get-ItemProperty -Path 'HKLM:\SOFTWARE\Microsoft\Windows\CurrentVersion\Authentication\LogonUI\UserSwitch' -Name Enabled
After the next reboot, all local user accounts will be displayed on Windows 10/8.1 logon screen instead of the last one.
Tip. Instead of the standard user icons, you can configure the user profile photo from Active Directory to be displayed.
Tip. If the task is successfully triggered, but the list of local users is not displayed, make sure if the policy Interactive Logon: Do not display last username (see Computer Configuration\Windows Settings\Security Settings\Local Policies\Security Options) is disabled.
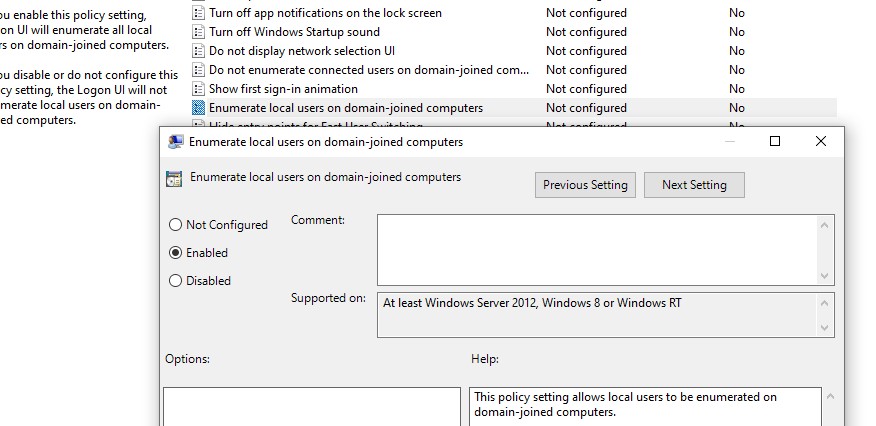
There is a separate group policy setting that makes it much easier to list local users account on the Welcome screen of the domain-joined computers. Open the GPO editor, go to the section Computer Configuration -> Administrative Templates -> System -> Logon and enable the policy “Enumerate local users on domain-joined computers”.
Showing Logged Domain Users on Windows 10 Login Screen
If several domain users use one computer, on the welcome screen you can display a list of users who have local active/disconnected session (users will only be displayed if they are logged in, for example, when using public computers, kiosks, an RDS server or its Windows 10 analogue).
To do this, check that in the Computer Configuration -> Windows Settings -> Security Settings -> Local Policies -> Security Options the following policies are disabled:
- Interactive logon: Don’t display last signed-in: Disabled
- Interactive logon: Don’t display username at sign-in: Disabled
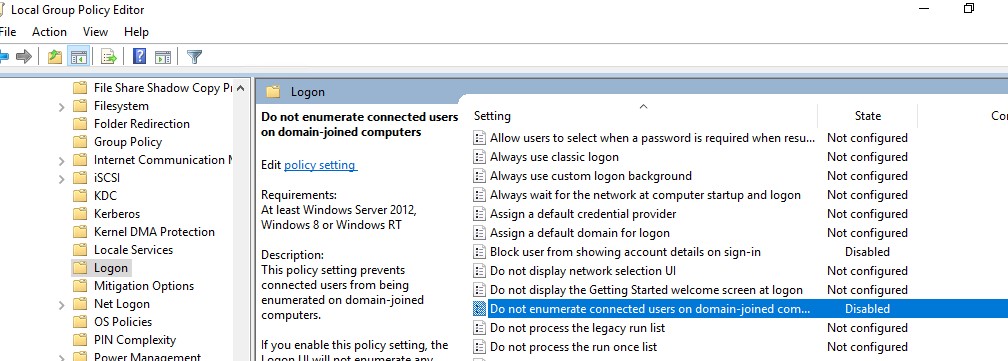
Then disable the policies in the section Computer Configuration -> Administrative Templates -> System -> Logon:
- Block user from showing account details on sign-in: Disabled
- Do not enumerate connected users on domain-joined computer: Disabled
After that, the welcome screen will display a list of accounts with active sessions that have logged in but have been disconnected. It is enough for the user to log in once, and after that just select an account from the list and enter the password.
How to Hide Specific User Account from the Sign-in Screen?
The Windows Welcome screen displays users who are members of one of the following local groups: Administrators, Users, Power Users, Guests.
You can hide any user from the list on the Windows 10 sign-in screen by running the command:
reg add "HKLM\SOFTWARE\Microsoft\Windows NT\CurrentVersion\Winlogon\SpecialAccounts\UserList" /t REG_DWORD /f /d 0 /v UserName